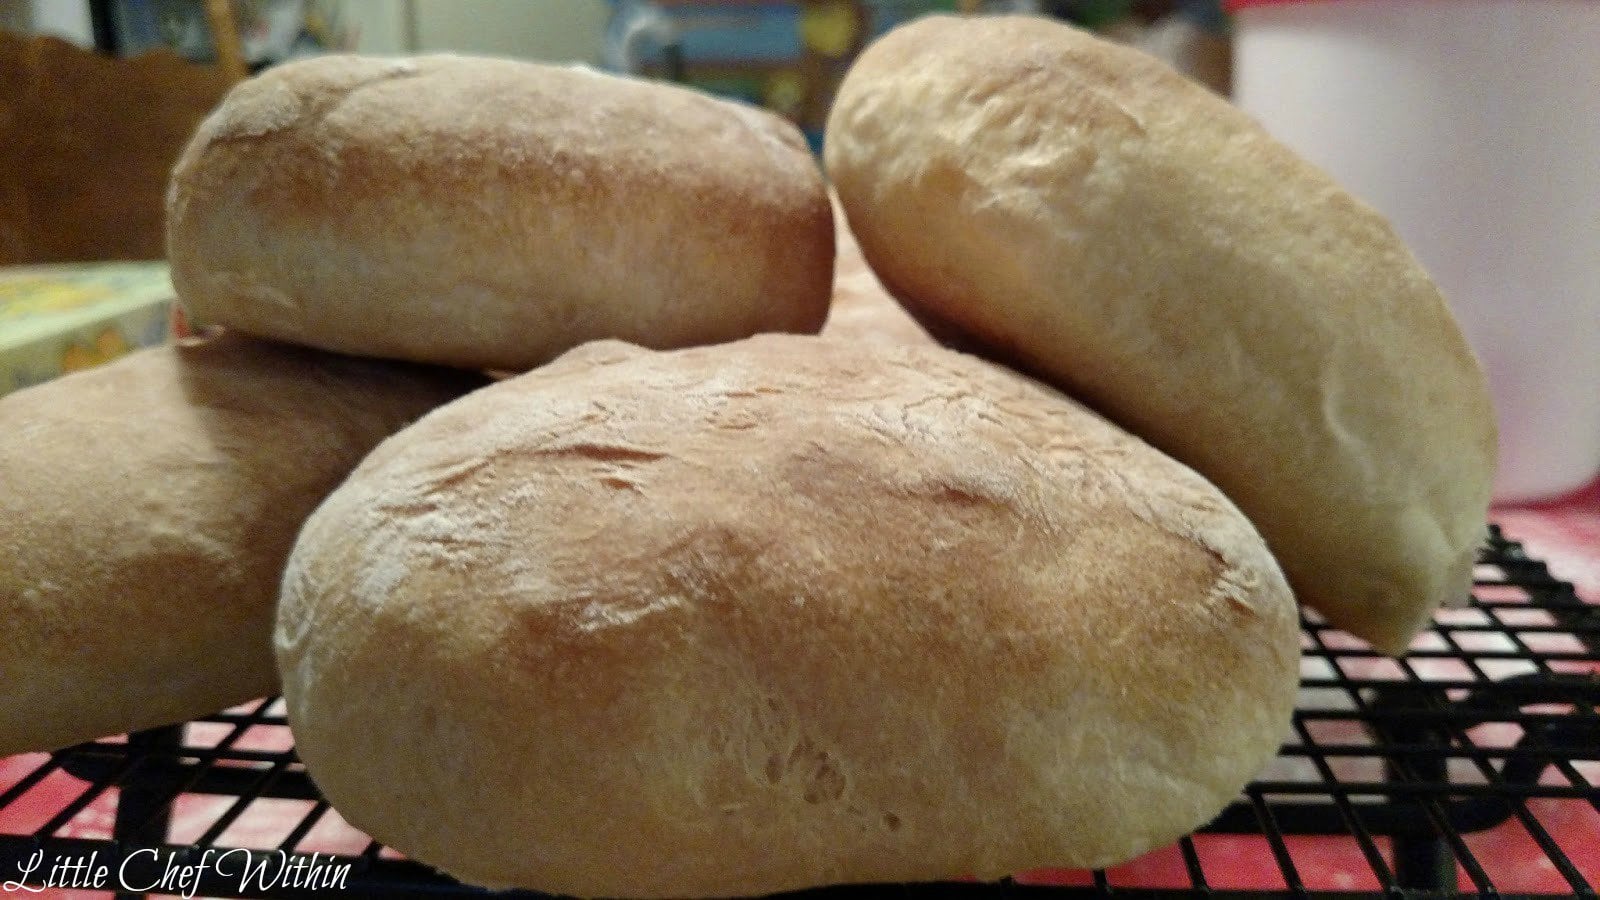
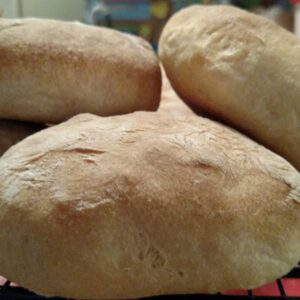
Ciabatta Rolls

This post contains links to affiliate websites, such as Amazon, and we receive an affiliate commission for any purchases made by you using these links. We appreciate your support!

Bake perfect homemade Ciabatta Rolls with our easy recipe! These rolls aren’t just tasty; they’re kind of a big deal. With a crust that’s just the right kind of crunchy and an inside that’s soft and chewy, ciabatta bread rolls are like the all-stars of the bread world. They can make any sandwich better and can turn a humble bowl of soup into something special. Best of all, they’re not that hard to bake right in your own kitchen. My Ciabatta bread dough is even easier because it’s done in the Bread Machine for you! Easy peasy!! So, stick around if you want to know more about these Italian beauties, how to bake them, and how to get the most out of every roll.

ciabatta rolls on a cooling rack
ciabatta rolls

Save this Recipe for later!

We'll email this recipe to you, so you can come back to it!

Where did Ciabatta bread originate from?

In 1982, Italian baker Arnaldo Cavallari set out to rival the popular French baguette. After a series of trial and error in his Venetian bakery, Cavallari crafted a unique flat, oval bread with a crusty exterior and airy interior. This ‘ciabatta’ bread, named for its slipper-like shape, quickly caught on in Italy and around the world, cementing its status as a beloved staple in international bread culture.

​Ciabatta rolls are famous for being nice and chewy on the inside. The dough for these rolls is super wet, which can make it a bit of a pain to work with. This is why a bread machine is a must when I make this ciabatta bread recipe. But don’t worry, I walk you through the process by hand in case bread machines aren’t your thing.

Ciabatta sandwich
ciabatta buns

What are Ciabatta rolls used for? These homemade rolls can be used for a variety of purposes. They make excellent sandwich bread as they can hold up to hearty fillings without becoming soggy. They also pair well with soups and stews or can be sliced and toasted for breakfast or as part of an antipasto platter. My family loves eating them with roast beef sandwiches with homemade garlic aioli. 

LittleChefTip:

Let kids roll the dough out and shape into buns or whatever creative shape they want! Just make sure their little hands are well floured beforehand or have very wet hands.

INGREDIENTS

You’ll only need a handful of ingredients to make this delicious homemade ciabatta bread

  • water
  • salt- I like to use sea salt
  • sugar- I use white sugar
  • extra virgin olive oil
  • flour- I prefer using Bread Flour
  • yeast-I use Instant Yeast

How to Make Ciabatta Rolls in the Bread Machine:

  1. Add the water, sea salt, sugar, olive oil, bread flour, and yeast to your bread machine in the listed order. Use the Dough setting to start the process.
  2. Once the cycle is complete, you will notice that the dough ball has a sticky consistency. Resist the urge to add more flour. Gently remove the dough and place it on a lightly floured surface, covering it with a large bowl. Allow it to rest for 20 minutes.
  3. During the dough’s resting period, lightly grease a baking sheet. After resting, divide the dough into equal parts with a dough cutter. Using hands lightly dusted with flour, shape each part into the form of a bun and place them on the prepared baking sheet.
  4. Create the distinctive appearance of ciabatta rolls by using your floured fingers to make dimples on the surface of each roll. Once you’ve finished dimpling the rolls, cover them and allow them to rise for about 45 minutes. This step is important to achieve the right texture.
  5. Preheat your oven to 425 degrees Fahrenheit as the dough rises. If you’d like a crisper crust, just before you put your dough in the oven, throw a handful of ice cubes into a preheated pan on the bottom rack of your oven. Be careful to avoid any steam that may rise.Immediately place your dough in the oven and close the oven door to trap the steam inside. Alternatively you can consider placing a baking tray filled with boiling water at the bottom of the oven to create steam during baking.
  6. Once your rolls have had their time to rise and the oven’s up to temperature, it’s time to bake. Slide your ciabatta rolls into the oven and give them about 25 minutes, or until they’re a golden brown. Once baked, remove them from the oven and let them cool on a wire rack before serving.

How to Make Ciabatta Rolls by Hand:

No bread machine? No worries! Simply follow these easy directions.

  1. If you’re using instant yeast, you can mix all the ingredients together. If you’re using active dry yeast, dissolve it in the warm water with the sugar first and let it sit for about 5 minutes, until it starts to foam.
  2. Combine the yeast mixture, salt, olive oil, and bread flour in a large mixing bowl.
  3. Stir everything together until it forms a sticky dough.
  4. Turn the dough out onto a floured surface and knead it for about 10 minutes. The dough will be quite sticky, but resist the urge to add too much extra flour.
  5. Once you’ve kneaded the dough, place it in a greased bowl. Cover it either with a damp cloth or plastic wrap. Leave it to rise in a warm area until it’s doubled in size. This will take about 1 to 1.5 hours, depending on the warmth of your kitchen.
  6. Once the dough has risen, turn it out onto a floured surface. Divide the dough into equal portions (depending on the size of rolls you want), shape them into bun form with floured hands, and place them on a lightly greased baking sheet.
  7. Dimple the surface of each roll with your fingers, then cover them with a damp cloth or loosely with plastic wrap. Let them rise again for about 45 minutes.
  8. While the rolls are rising, preheat your oven to 425 degrees Fahrenheit (220 degrees Celsius).
  9. Bake the rolls in the preheated oven for about 25 minutes, or until they are golden brown.

SUBSTITUTIONS AND ADDITIONS

Substitutions:

  1. Flour: If you don’t have bread flour, you can use all-purpose flour. However, the texture might be slightly different, as bread flour has a higher protein content, which contributes to a chewier texture.
  2. Oil: If you don’t have extra virgin olive oil, you can use any neutral-flavored oil like canola or vegetable oil. Some people even use melted butter for an added richness.
  3. Yeast: You can interchange active dry yeast and instant yeast, please see Recipe FAQs.  You may need to adjust the amount and procedure slightly.

Additions:

  1. Herbs and Spices: To add more flavor to the ciabatta rolls, consider adding dried herbs such as rosemary, thyme, or oregano into the dough. Spices like garlic powder or onion powder could also be great additions.
  2. Seeds: For an added crunch, consider topping your rolls with seeds like sesame or poppy seeds before baking.
  3. Cheese: Add some grated cheese (like Parmesan or Asiago) into your dough for a cheesy twist on your ciabatta rolls.
  4. Whole grains: For a healthier spin, consider adding a small amount of whole grains like flax or sunflower seeds into your dough. Note that adding too much could affect the dough’s hydration and rise.

RECIPE FAQS

  1. Why is my dough so sticky? Is it supposed to be that way? Yes, ciabatta dough is supposed to be very sticky. It’s a high-hydration dough, meaning it has more water compared to flour. The high water content helps create the distinctive airy, hole-filled texture of the bread.
  2. Can I use all-purpose flour instead of bread flour? You can, but bread flour is recommended because it has a higher protein content, which results in more gluten formation and gives ciabatta its chewy texture. All-purpose flour will yield a softer, less chewy bread.
  3. Why are there dimples in the dough? The dimples help create the ciabatta’s characteristic texture and appearance. They also prevent the dough from puffing up too much during baking, ensuring it retains its signature flat shape.
  4. Can I let the dough rise longer for more flavor? Absolutely! A longer rise (also known as proofing) at a cooler temperature (like in the refrigerator) can help develop more complex flavors. Just be sure to let the dough come back to room temperature before shaping and baking.
  5. Can I use active dry yeast instead of instant yeast in this recipe? Yes, you certainly can! Active dry yeast is a good substitute for instant yeast. Just remember, it needs to be activated or ‘proofed’ before you use it.
    • How do I ‘proof’ the active dry yeast? To proof active dry yeast, dissolve it in a little bit of warm water (about 110°F) from the recipe. Add a pinch of sugar, then wait for about 5-10 minutes. The yeast should start to froth or foam up a bit, which means it’s ready to use.
    • How much active dry yeast should I use as a substitute for instant yeast? A good rule of thumb is to use about 25% more active dry yeast to replace instant yeast. This means, if the recipe calls for 1 teaspoon of instant yeast, you can use approximately 1 and 1/4 teaspoons of active dry yeast.
    • Will using active dry yeast change the rising time? Usually, dough rises a bit slower with active dry yeast compared to instant yeast. You should allow the dough to rise until it has doubled in size, which could take a bit longer than the original recipe timing.
    • Can I still use the bread machine if I’m using active dry yeast? Sure thing! If you’re using a bread machine, add the ingredients as directed, but remember to dissolve the active dry yeast in warm water before adding it to the machine.
    • Do I still need to add sugar if I’m using active dry yeast? Yes, you do. The sugar helps activate the active dry yeast, providing the yeast with energy to help your bread rise.
  6. Why did my bread come out dense and not airy? This could be due to a few reasons: the dough may have been over-kneaded, which can deflate the air bubbles that create the ciabatta’s airy texture; the dough may not have been allowed to rise long enough; or the yeast may not have been active.
  7. Can I freeze these rolls? Absolutely! After they cool completely, wrap each roll individually in plastic wrap, then place the wrapped rolls in a freezer-safe bag or container. When you’re ready to use a roll, let it defrost at room temperature, then warm it slightly in the oven if you’d like.

STORAGE: 

How do I store this type of Italian bread?

  1. At Room Temperature: After the ciabatta rolls have cooled completely, place them in a paper bag, then put that bag in a plastic bag. This double-bagging technique helps keep the rolls fresh while maintaining their crispy crust. Store the bag in a cool, dry place. They should stay fresh for about 2 to 3 days.
  2. In the Refrigerator: While refrigeration can extend the shelf life of the ciabatta rolls, it may cause them to lose their crusty exterior. If you choose to refrigerate them, use within 5-7 days.
  3. In the Freezer: If you’d like to keep your ciabatta rolls for a longer period, freezing is a great option. Allow the rolls to cool completely, then wrap each roll individually in plastic wrap, and place the wrapped rolls in a freezer-safe bag or container. They can be frozen for up to 3 months. When you’re ready to eat a roll, thaw it at room temperature, and to regain some of the crustiness, you can reheat it in the oven at 350°F (175°C) for a few minutes.

Remember, regardless of how you store your ciabatta rolls, it’s important to keep them in a cool, dry place and to use good-quality, airtight storage bags or containers. This will help to prevent mold and extend the shelf life of your bread.

Can I freeze these Ciabatta buns?

Yes! You can freeze these  to extend their shelf life and enjoy them later. 

  1. Allow the ciabatta rolls to cool completely after baking. It’s important not to rush this step because any residual heat can cause condensation, leading to a soggy bread or freezer burn.
  2. Wrap each roll individually in plastic wrap or aluminum foil. This will protect them from absorbing flavors from your freezer and also prevent them from drying out.
  3. Put the wrapped rolls into a freezer-safe bag or container. Be sure to squeeze out as much air as possible before sealing to keep them fresh and avoid freezer burn.
  4. Label the bag or container with the date. The frozen rolls can be stored in the freezer for up to 3 months.

How to heat from frozen: When you’re ready to enjoy a roll, thaw it at room temperature. If you prefer a warm, crispy crust, you can reheat it in the oven at 350°F (175°C) for about 10 minutes.

What to serve with this delicious bread:

  1. Soups and Stews: The crusty exterior and soft interior of ciabatta make it perfect for dipping into a hearty soup or stew. Think Pasta e fagioli soup, tomato basil soup, beef stew, or clam chowder.
  2. Pasta: Serve these Italian rolls on the side of a big bowl of pasta, whether it’s Italian Pasta Sauce, fettuccine alfredo, or delicious Meatballs.
  3. Charcuterie Board: Slice the ciabatta rolls and serve them as part of a charcuterie board with a variety of cheeses, meats, olives, and spreads.
  4. Sandwiches: Ciabatta rolls are great for sandwiches due to their sturdy structure. Fill them with Italian cold cuts, grilled vegetables, cheese, or leftover roast meat.
  5. Salads: A warm ciabatta roll can be a great accompaniment to a fresh salad. It brings in a nice crunch and is perfect for mopping up any leftover dressing
  6. Barbecue: Ciabatta rolls are fantastic served with barbecued meats, whether it’s burgers, pulled pork, or grilled chicken.
ciabatta rolls on a cooling rack

Ciabatta Rolls

Vicky
Bake perfect homemade ciabatta rolls with our easy recipe. Crusty, soft, and versatile, these Italian bread rolls elevate any meal!
4.75 from 4 votes
Prep Time 1 hour 30 minutes
Cook Time 25 minutes
Resting and Rise Time 50 minutes
Total Time 3 hours
Course Breads
Cuisine Italian
Servings 10 buns

Ingredients
  

  • 1 1/2 cups water
  • 1 1/2 teaspoon sea salt
  • 1 teaspoon white sugar
  • 1 Tablespoon olive oil
  • 3 1/4 cups bread flour
  • 1 1/2 teaspoon yeast

Instructions
 

  • Add the water, salt, sugar, oil, flour, and yeast, to your bread machine in the listed order. Use the Dough setting to start the process.
  • Once the cycle is complete, you will notice that the dough will be very sticky, DO NOT add extra flour. Place on a lightly floured surface, cover with a large bowl. Let rest 20 minutes.
  • During the dough's resting period, lightly grease a baking sheet. After resting, divide the dough into equal parts with a dough cutter. Using hands lightly dusted with flour, shape each part into the form of a bun and place them on the prepared baking sheet.
  • Create the distinctive appearance of ciabatta rolls by using your floured fingers to make dimples on the surface of each roll. After you're done dimpling, cover the rolls and let them rise for 45 minutes
  • Preheat your oven to 425 degrees Fahrenheit as the dough rises. If you'd like a crisper crust, consider placing a baking tray filled with boiling water at the bottom of the oven to create steam during baking.
  • When the rolls have finished rising and your oven is heated, bake your ciabatta rolls for 25 minutes, or until they turn a lovely shade of golden brown. Once baked, remove them from the oven and let them cool on a wire rack before serving.

Notes

HOW TO MAKE CIABATTA ROLLS BY HAND:
  1. If you’re using instant yeast, you can mix all the ingredients together. If you’re using active dry yeast, dissolve it in the warm water with the sugar first and let it sit for about 5 minutes, until it starts to foam.
  2. Combine the yeast mixture, salt, olive oil, and bread flour in a large mixing bowl.
  3. Stir everything together until it forms a sticky dough.
  4. Turn the dough out onto a floured surface and knead it for about 10 minutes. The dough will be quite sticky, but resist the urge to add too much extra flour.
  5. Once the dough has been kneaded, place it in a greased bowl, cover with a damp cloth or plastic wrap, and let it rise in a warm place until it has doubled in size. This will take about 1 to 1.5 hours, depending on the warmth of your kitchen.
  6. Once the dough has risen, turn it out onto a floured surface. Divide the dough into equal portions (depending on the size of rolls you want), shape them into bun form with floured hands, and place them on a lightly greased baking sheet.
  7. Dimple the surface of each roll with your fingers, then cover them with a damp cloth or loosely with plastic wrap. Let them rise again for about 45 minutes.
  8. While the rolls are rising, preheat your oven to 425 degrees Fahrenheit (220 degrees Celsius).
  9. Bake the rolls in the preheated oven for about 25 minutes, or until they are golden brown.
Keyword bread, bread machine, ciabatta, rolls
Tried this recipe?Let us know how it was!

Love this? Please share!

Similar Posts

4 Comments

  1. Made the ciabatta rolls! Delicious! Thanks so much for this recipe your love of the Father and the love you have for your family

  2. Great recipe, though I would have liked to know what size sheet pan to use. I do appreciate the basic directions!

  3. 5 stars
    Hi! LOVE the ciabatta rolls! Make weekly and freeze, thaws like fresh! I am wondering if you have tried these with gluten free flours? My daughter is celiac and I would love to surprise her! Thanks!

4.75 from 4 votes (3 ratings without comment)

Leave a Reply

Your email address will not be published. Required fields are marked *

Recipe Rating