
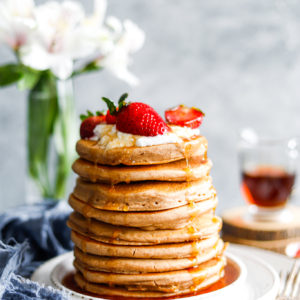
Homemade Old-Fashioned Pancakes
There’s something special about a stack of Homemade Old-Fashioned Pancakes that brings a sense of nostalgia to the breakfast table. This simple, classic recipe makes thick, fluffy pancakes just like Grandma used to make. Whether it’s a lazy Sunday morning or a quick weekday breakfast, these pancakes are sure to satisfy the whole family. Made with pantry staples and buttermilk for extra fluffiness, they’re perfect for a comforting breakfast that feels like home.
Looking for more Pancake Recipes: Try our Pumpkin Pie Spice Pancakes, Whole Wheat Pancakes, Sourdough Discard Pancakes. These Cannoli Pancakes are also super delicious! Or maybe you’re team waffle, and that’s okay, I get you! Here’s our favorite Belgian Waffles recipe.

SAVE THIS RECIPE FOR LATER!
If you’re craving good old-fashioned pancakes made with simple ingredients, this homemade pancake recipe is just what you need. Start by whisking together the wet ingredients in a large mixing bowl to create a smooth pancake batter. For the perfect pancake, cook them on a lightly oiled griddle or cast iron skillet over medium-high heat, watching for those little air bubbles to know when it’s time to flip. The best part? You can add chocolate chips or your favorite toppings like syrup or fruit! And if you have any leftover pancakes, pop them in the freezer for a quick meal on busy weekend mornings!
What you’ll love about this Homemade Pancakes Recipe:
- FLUFFY & DELICIOUS– These pancakes are thick, fluffy, and perfect for soaking up syrup or spreading with butter.QUICK & EASY – You don’t need much time or effort to whip these up, making them great for both busy mornings and lazy weekends.FAMILY-FRIENDLY – Pancakes are a breakfast favorite, and this classic recipe is sure to be a hit with the whole family. Perfect for kids and adults alike!
Recipe Ingredients
You’ll need the following ingredients to make these amazing Homemade Old-fashioned Pancakes:
- Self-Rising Flour-This is the key ingredient for fluffy, old-fashioned pancakes. For best results, make sure the flour is at room temperature, some people like to keep it in the fridge, although I never have.
- White sugar
- Egg
- Buttermilk
- Milk
Be sure to check out the full recipe and ingredient list below
INGREDIENT NOTES:
- Self-Rising Flour: Using self-rising flour makes this recipe extra simple. It already contains baking powder and salt, which helps the pancakes rise and keeps them light and fluffy.
- Buttermilk: Buttermilk is the key ingredient here. It gives these pancakes a rich, tangy flavor and helps them rise beautifully.
- Melted Butter: A little bit of melted butter in the batter adds richness and flavor, making this the only recipe you’ll need for good pancakes.
How to make Homemade Buttermilk Pancakes:
HOW TO MAKE HOMEMADE PANCAKES
STEP 1:
In a large bowl, whisk together 2 cups of self-rising flour and 1/2 cup white sugar.
STEP 2:
In a small bowl, whisk the egg, 1 1/2 cups buttermilk, and 1 cup milk until smooth. If you want even fluffier pancakes, let the batter rest for a few minutes. Combine this mixture into the dry ingredients, and stir just until small lumps remain. Be sure not to overmix to avoid tough pancakes.
STEP 3:
Preheat a large, well-seasoned cast-iron skillet or your favorite griddle over medium-high heat. Lightly grease with unsalted butter or vegetable oil.
STEP 4:
Using a 1/4 cup measuring cup, pour batter onto the hot skillet. You’ll notice small bubbles forming in the center of each pancake—this is your sign to flip! Cook each pancake for 2-3 minutes per side, until golden brown with crispy edges.
STEP 5:
Flip the pancakes and cook for an additional 2-3 minutes, until golden brown on both sides. Transfer the pancakes to a serving plate.
STEP 6:
For best pancakes, transfer cooked pancakes to a baking sheet in a single layer and keep warm in the oven on low heat. Repeat until all batter is used.
Pro Tip:
For extra fluffy pancakes, let the batter rest for about 5 minutes before cooking. This allows the baking powder in the self-rising flour to activate and give the pancakes more lift.
Storage and Reheating
- Leftover Pancakes: Let pancakes cool completely and place them in freezer bags in a single layer. Reheat in a toaster oven for a quick breakfast during busy mornings.
- Freezing: Freeze pancakes between layers of parchment paper for up to 3 months. Reheat directly from frozen in a skillet or microwave.

Substitutions & Additions:
Additions:
- Vanilla Extract: Add 1 teaspoon for extra flavor.
- Cinnamon: Sprinkle a little cinnamon in the batter for a warm, spiced twist.
Substitutions:
- Milk: You can use almond or oat milk for a dairy-free version if need be.
- Buttermilk: If you don’t have buttermilk, mix 1 tablespoon of vinegar or lemon juice with 1 1/2 cups of regular milk as a substitute.

FAQs about this Good Old Fashioned Pancake Recipe:
Can I use whole milk instead of buttermilk?
Yes, but for best results, add a little white vinegar to your milk to replicate the tanginess of buttermilk.
How can I prevent soggy pancakes?
Cook on medium-high heat, making sure the griddle or skillet is hot enough before pouring the batter to ensure crispy edges.
Can I cook these pancakes on an electric griddle?
Yes, you can cook these pancakes on an electric griddle. Set the temperature to about 350°F and follow the same cooking instructions as with a stovetop griddle or large frying pan.

What Can I Serve with these Fluffy Pancakes?
Serve these fluffy old-fashioned pancakes with maple syrup, fresh fruit, or even a drizzle of buttermilk syrup for a perfect weekend breakfast.
I’m excited for you to try this Homemade Old Fashioned Pancakes Recipe! After you make it, please leave a rating to let me know your thoughts on it – I’m eager to hear if you loved it as much as we do!
Homemade Old-Fashioned Pancakes
Equipment
Ingredients
- 2 cups Self Rising Flour Grandma prefers Hudson Cream
- 1/2 cup white sugar
- 1 egg
- 1 1/2 cups Buttermilk
- 1 cup milk
Instructions
- In a large mixing bowl, combine 2 cups of Self-Rising Flour and 1/2 cup of white sugar. Mix well to combine the dry ingredients.
- In a separate bowl, whisk together 1 large egg, 1 1/2 cups of buttermilk, and 1 cup of milk. Gradually pour the wet ingredients into the dry ingredients, mixing until the batter is well combined and smooth. The batter should be thick, similar to a cake batter consistency.
- Preheat a griddle or a large non-stick skillet over medium heat. Lightly grease the surface with butter or cooking spray.
- Using a measuring cup, pour the batter onto the preheated griddle. Cook each pancake until bubbles form on the surface and the edges appear set, about 2-3 minutes.
- Flip the pancakes and cook for an additional 2-3 minutes, or until they are golden brown on both sides. Remove the pancakes from the griddle and transfer to a serving plate. Repeat with the remaining batter, greasing the griddle as needed.
Wow! These looks delicious! Thanks for linking up with us for Friday Favorites. Please come back and link up with us again!
I love how simple this recipe is! I can’t wait to try them!
I love simple recipes! I hope you enjoy it as much as we do!
I hope you enjoy the recipe as much as we do, Mariah!
Pancakes are one of my favorite food items on this entire universe. I love to have them any day of the week. This looks delicious and got to try it soon.
Pancakes are one of my favorite foods ever! I love how simple and delicious this recipe looks. Can’t wait to try it!
I hope you like them as much as we do! Please come back and let me know!