
100% Whole Wheat Bread (made with Freshly Milled Wheat)
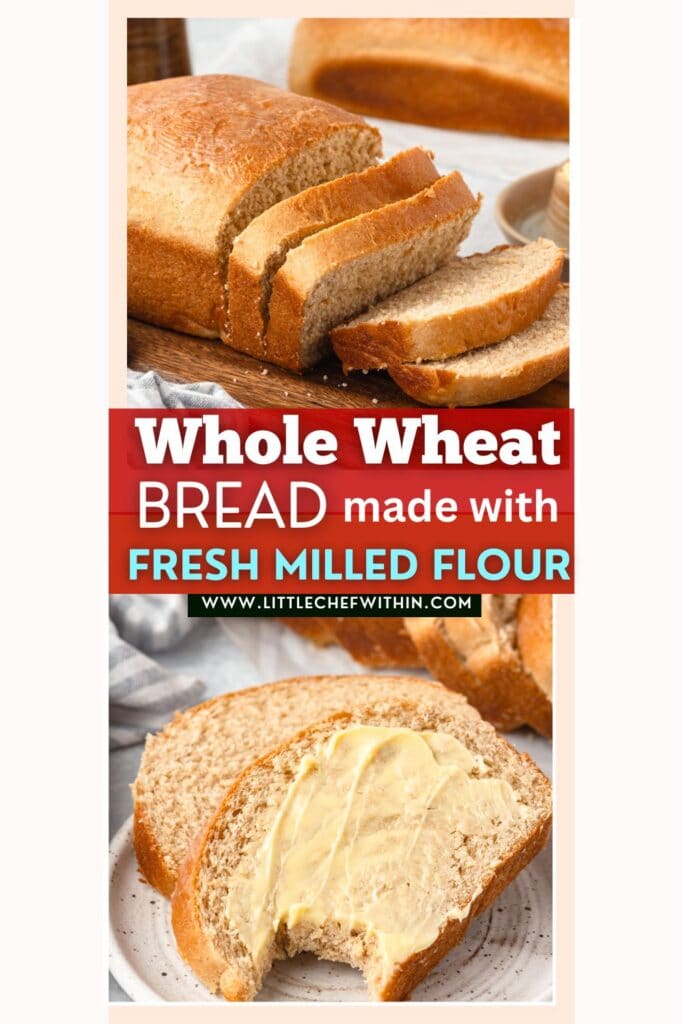
My recipe for 100% Whole Wheat Bread made with freshly milled flour is a game changer when it comes to both flavor and nutrition. If you are looking for a fresh milled flour bread recipe that produces a soft, fluffy loaf without the strong whole wheat taste that sometimes puts people off, this one is a great place to start. My secret ingredient helps create a loaf that is light, tender, and full of flavor.
Freshly milled whole wheat flour has a subtle sweetness and nuttiness that you just cannot get from store bought flour. Because the grain is freshly ground, all the natural oils and nutrients are still intact, giving the bread a richer flavor and more wholesome texture. The difference in taste is noticeable right away.

SAVE THIS RECIPE FOR LATER!
Why Bake Bread with Freshly Milled Flour?
When you mill your own flour, you preserve the bran and the germ of the wheat berry. The bran contains the fiber, the germ contains the vitamins, minerals, and natural oils. These are the parts that give fresh milled flour its flavor, that subtle sweetness and nuttiness you cannot get from a bag off the shelf.
Store-bought flour is milled and then sits in warehouses and on store shelves. The natural oils in the bran and germ oxidize during that time, which dulls the flavor and reduces the nutritional value. Freshly milled flour goes from berry to bowl in minutes. The difference in flavor is noticeable from the first loaf.

How I Started Baking with Freshly Milled Flour
Several years ago, my husband mentioned something he thought I’d find interesting. A woman on a religious program was talking about milling wheat berries. That woman was Sue Becker from Bread Beckers, and I was instantly fascinated. Her words sparked something in me, and I started researching everything I could about fresh milled flour!
Before long, I ordered a grain mill, some wheat berries, and her cookbook. I began baking fresh bread for my family, hoping it might help two of my sons who struggled with chronic constipation. To my surprise, it worked! Their stomach issues went away completely.
Even though I had more than 20 years of experience baking bread, freshly milled flour was a whole new challenge! None of my old methods worked at first. My loaves were crumbly and flat, and nothing like what I was used to. But I kept experimenting until I finally figured it out.
Before you dive in, if your fresh milled flour bread has ever come out dense, gummy, or just not quite right, my Complete Guide to Freshly Milled Flour is exactly what you need!
It walks you through everything I wish someone had told me when I started, so you can stop guessing and actually get it right. Grab it right here. Complete Guide to Freshly Milled Flour!
Why I Add Apple Cider Vinegar to Whole Wheat Bread
I started out using the recipes in Sue Becker’s cookbook and eventually began developing my own. I’ve created a couple whole wheat bread recipes over the years, but this one has a secret ingredient that really changed everything for me: apple cider vinegar.
The acidity of apple cider vinegar helps strengthen the gluten structure in the dough, which leads to a better crumb and a softer loaf. This can be especially helpful when baking with whole wheat flour, which sometimes produces a denser bread.
I worked on this recipe for about a year and a half before finally adding vinegar, and it made a noticeable difference. You won’t taste the vinegar at all. It’s optional, but I highly recommend it.
What you’ll love about this Freshly Milled Whole Wheat Bread:
Ingredients
Freshly milled hard white wheat flour (3 cups): Mill first, then measure, do not measure the berries and mill to that amount. Freshly milled flour is warmer and fluffier right out of the mill and measures differently than settled flour. I mill extra and store the excess in the freezer. Let the flour cool for a few minutes before using if it feels warm from the mill.
Hard white wheat is my family’s preference for this recipe. It produces the mildest, slightly sweet flavor of all the hard wheat varieties. Hard red wheat works as a cup for cup substitution and gives you a stronger, earthier flavor. I have also used a 50/50 blend of hard white and hard red with good results. Avoid soft wheat flour, it is too low in protein for bread and will not give you the structure you need. In a pinch you can add a cup or two of soft wheat to hard wheat, but not more than that.
Warm whole milk (1 1/4 cups, about 105°F): Milk adds richness and tenderness to the crumb that water does not provide. Water works as a substitute and still produces a good loaf, just slightly less soft and rich. Use the same amount. If your family is lactose intolerant, non-dairy milks work here too.
Butter (2 tablespoons, very softened or melted): Adds tenderness and flavor. Oil works as a substitute, use about 1.5 tablespoons of a neutral oil like avocado or light olive oil. The texture is slightly different but still good.
Honey (2 tablespoons): Sweetens the loaf mildly and feeds the yeast. Maple syrup works as a direct substitute. Do not skip the sweetener entirely, the yeast needs it and the flavor will be noticeably flat without it.
Apple cider vinegar (1 teaspoon): This is the ingredient that took this recipe from good to reliably excellent. The acidity strengthens the gluten structure in the dough and helps produce a softer, less crumbly loaf. You will not taste it. White vinegar or lemon juice work as substitutes, you want something acidic. It is optional but I highly recommend it.
Salt (1.5 teaspoons): Do not reduce it. Salt controls the yeast activity and without enough of it the dough rises too fast and the flavor is flat.
Yeast (2.5 teaspoons, instant or active dry): Both work. If using instant yeast skip the proofing step in Step 1 and add the yeast directly with the flour. Freshly milled flour causes dough to rise faster than store-bought flour because the fresh bran particles are more active. Watch your dough during proofing, it may double faster than you expect.

How to Make Bread with Freshly Milled Flour:
STEP 1: In a large bowl combine the warm milk, yeast, and 1 teaspoon of sugar (this is optional, I like to give the yeast a little snack!). Let the mixture sit for 5 to 10 minutes until it becomes foamy. This shows that the yeast is active and ready to use.
STEP 2: Add the honey, melted butter, apple cider vinegar, and salt to the bowl. Gradually stir in the freshly milled whole wheat flour until a dough begins to form. Transfer the dough to a lightly floured surface.
STEP 3: Knead the dough for about 10 minutes by hand until smooth and elastic. If using a stand mixer, use the dough hook on speed 2 for 10 to 12 minutes. Freshly milled wheat needs the extra time compared to store-bought flour to develop proper gluten structure. The dough should be slightly tacky but not sticky. Adjust with a little extra flour or milk as needed.
STEP 4: Once the dough is ready, place it in a greased bowl and cover it with a clean kitchen towel. Let the dough rise in a warm, draft-free place for about 30-45 minutes, or until it has doubled in size. This first rise allows the dough to develop its flavor and texture.
STEP 5: After the first rise, gently punch down the dough to release any air bubbles. Gently punch down the dough to release air bubbles. When shaping, do a few folds, pull one side of the dough toward the center, then the opposite side, then the top and bottom. This builds structure that prevents large holes in the center of the finished loaf. Then shape into a log and place seam-side down in the greased loaf pan.
STEP 6: Cover the loaf with the towel and let it rise for another 30 to 45 minutes, or until the dough has risen about 1 inch above the pan’s rim. Watch it carefully. Freshly milled flour rises faster than store-bought and an overproofed loaf collapses in the oven.
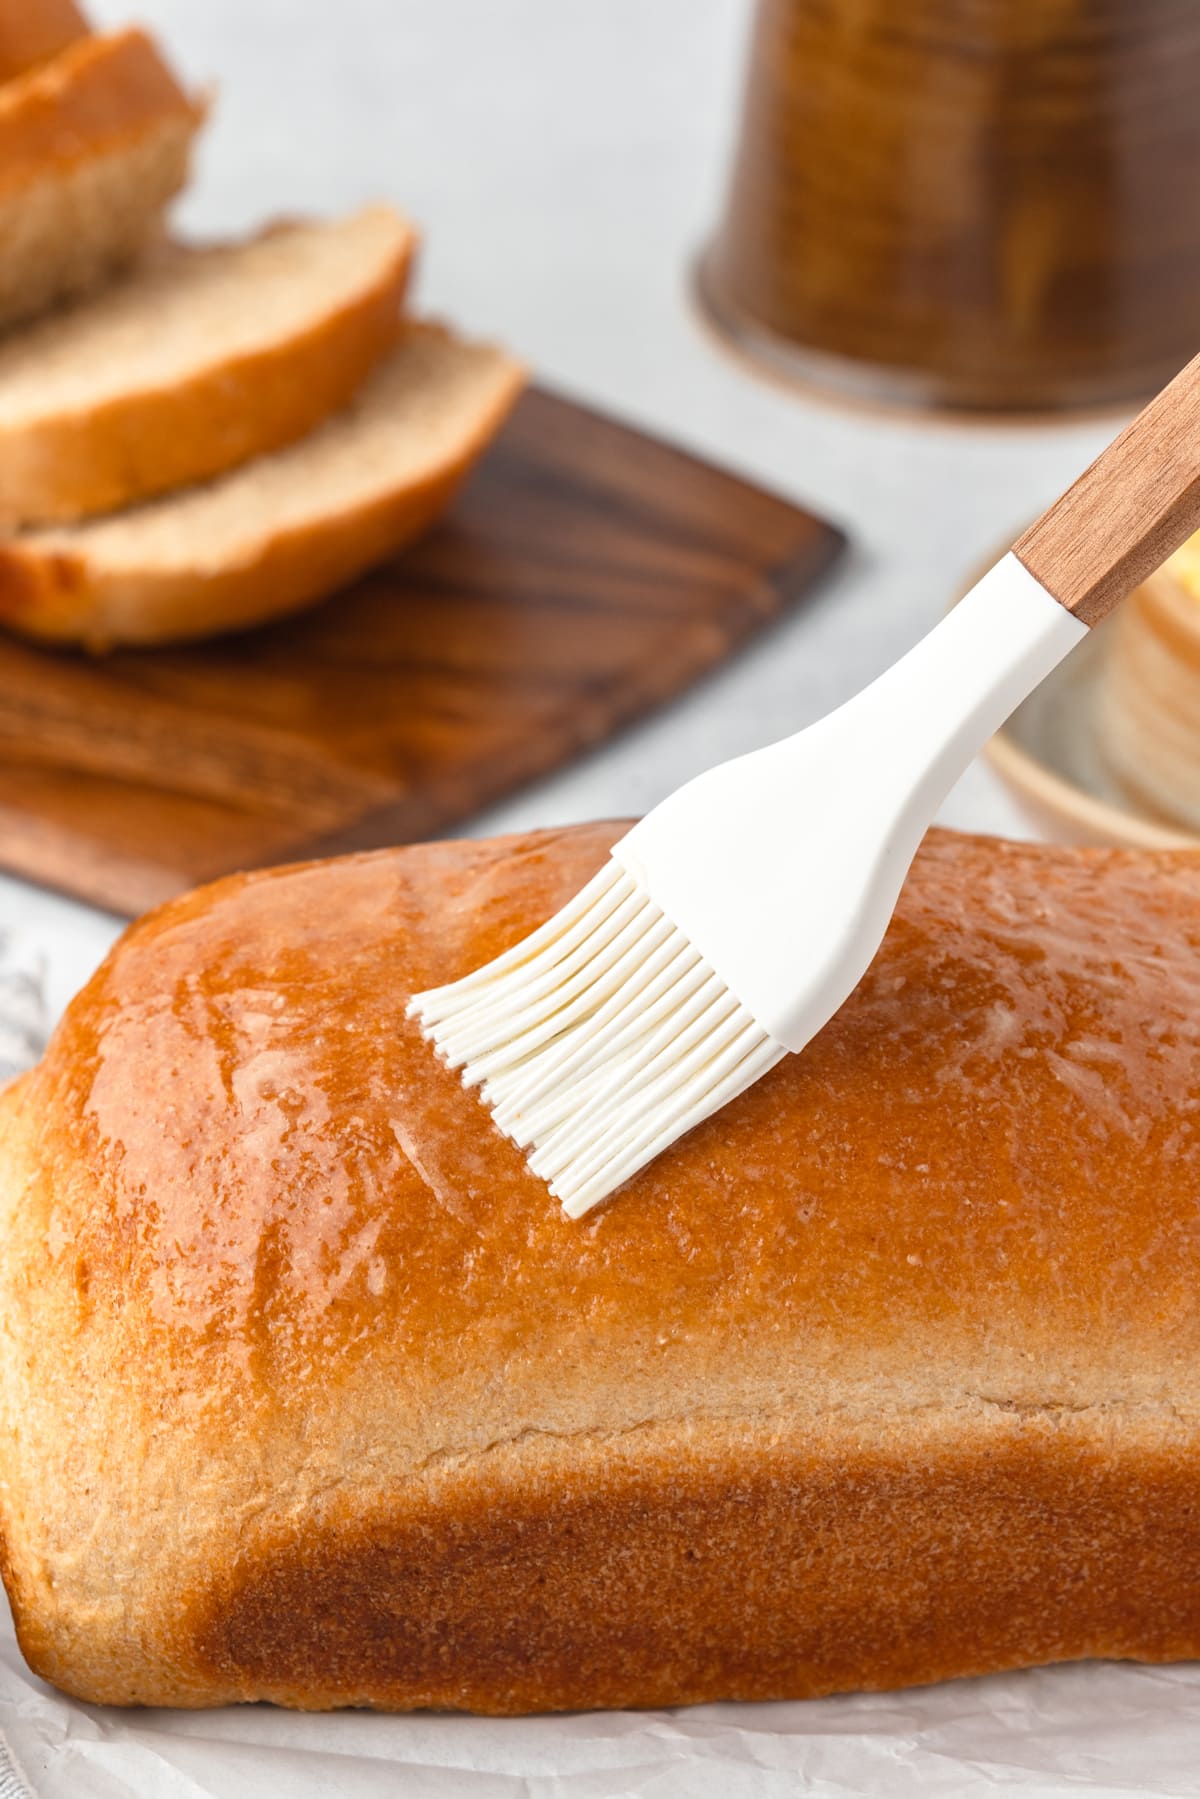
STEP 7: Preheat oven to 350°F. Bake the risen dough for 27 to 30 minutes, or until the loaf is golden brown and sounds hollow when tapped on the bottom, or an instant-read thermometer inserted into the center reads 190°F to 200°F.


Pro Tip
Freshly milled flour often causes dough to rise faster because it is more active than store-bought flour. Keep an eye on your dough during proofing so it does not over-rise. Ask me how I know! I will not mention how many loaves I overproofed when I first started!
Tools you’ll need
These are the products I use every day in my kitchen, and when you shop through these links, you’re helping us out with a small commission. It won’t cost you anything extra, but we truly appreciate your support!
Storage and Freezing:
Let the bread cool completely before storing. At room temperature in a plastic bag or bread box it keeps well for 3 to 4 days. Avoid the refrigerator, cold temperatures cause the starch in bread to crystallize faster, which makes it go stale more quickly than room temperature storage.
For longer storage, freeze it tightly wrapped for up to 3 months. Wrap individual slices in plastic wrap before putting them in a freezer bag. This prevents freezer burn and makes it easy to pull out one slice at a time. Toast straight from frozen or thaw at room temperature.
To revive slightly stale bread, wrap in a barely damp paper towel and microwave for 20 seconds, or warm in a 350°F oven for 5 minutes

What Can You Add to This Bread?
Seeds and nuts folded in after kneading add texture and nutrition without affecting the rise. Sunflower seeds, flaxseeds, or sesame seeds all work well, about 2 to 3 tablespoons. Chopped walnuts are good for a slightly richer flavor.
Vital wheat gluten is sometimes recommended for FMF breads to help with rise. I do not find it necessary when using freshly milled hard wheat flour which already has strong gluten potential. If you are getting flat loaves it is worth trying, add about one tablespoon per cup of flour.
Cinnamon and a little extra honey stirred into the dough gives you a mildly sweet loaf that is excellent toasted. Not a cinnamon swirl bread, just a subtle sweetness throughout.
SUBSTITUTIONS:
- Flour: Instead of Hard White Wheat flour, you can use Hard Red Wheat flour instead. I have also used a little bit of soft wheat flour mixed in when I’ve ran out and didn’t wanna mill anymore. But caution: soft wheat flour is NOT suited for bread making, it’s too low in protein to make a good loaf, but it will work in a pinch if you just need a cup or two to add in with the hard wheat.
- Vinegar: You can replace apple cider vinegar with white vinegar instead. Lemon juice would work too. You want something acidic here.
Questions About This Freshly Milled Whole Wheat Bread
Can I double this recipe?
Yes, and it is the most efficient way to bake with freshly milled flour. Make one double batch, let it go through the first rise together, then divide it before shaping and the second rise. Two pans, same second rise time, same bake time. I do this every week.
Can I knead this in a KitchenAid or stand mixer?
Yes. Use the dough hook on speed 2 for 10 to 12 minutes. Freshly milled wheat is more coarse than store-bought flour and needs the extra time to develop gluten structure properly. Watch the dough rather than the clock. It should be smooth and slightly tacky when done.
Can I use hard red wheat instead of hard white?
Yes, cup for cup. Hard red wheat produces a stronger, earthier, slightly more bitter flavor than hard white. My family prefers the milder flavor of hard white for everyday sandwich bread, but hard red works well and many people prefer it. The texture is essentially the same.
Should I mill then measure, or measure the berries first?
Mill first, then measure the flour. Freshly milled flour is warmer and fluffier right out of the mill and measures inconsistently if you try to measure before milling. I mill extra each time and store the excess in the freezer so I have it ready for the next batch.
Can I use water instead of milk?
Yes. The loaf will be slightly less soft and rich since milk adds fat and tenderness that water does not, but it still makes a good bread. Use the same amount. Non-dairy milks work equally well.
Can I use oil instead of butter?
Yes. Use about 1.5 tablespoons of a neutral oil in place of 2 tablespoons of butter. The texture is slightly different but still good.
Why does my bread have large holes in the center?
Usually a shaping issue. When shaping the loaf after the first rise, do a few folds before rolling it into a log. Pull one side toward the center, then the other side, then the top and bottom. This builds structure and closes air pockets that would otherwise create large holes in the finished loaf.
Why is my bread crumbly after freezing?
Two possible causes. First, overproofing before baking weakens the gluten structure and produces a crumbly loaf both fresh and frozen. Make sure the dough rises just to 1 inch above the rim of the pan, not beyond. Second, freezing without proper wrapping dries the bread out. Wrap slices tightly in plastic wrap before putting them in a freezer bag. The apple cider vinegar also helps with crumbliness, if you skipped it, try including it next time.
Can I use sourdough starter instead of yeast?
I have not tested this personally, but it is possible with adjustments. You would need to omit the yeast, use about half a cup of active sourdough starter, and expect a significantly longer rise time. The ACV would not be necessary since sourdough is already acidic. If you try it, let me know how it turns out.
What if my bread does not rise?
Almost always one of three things: the yeast is expired or was killed by liquid that was too hot (above 110°F kills yeast), the proofing environment is too cold, or the milk was not warm enough to activate the yeast. Test your yeast first by proofing it in the warm milk with the optional teaspoon of sugar, it should foam within 10 minutes. If it does not foam, the yeast is the problem.

What Can I Serve with this 100% Whole Wheat Bread Recipe?
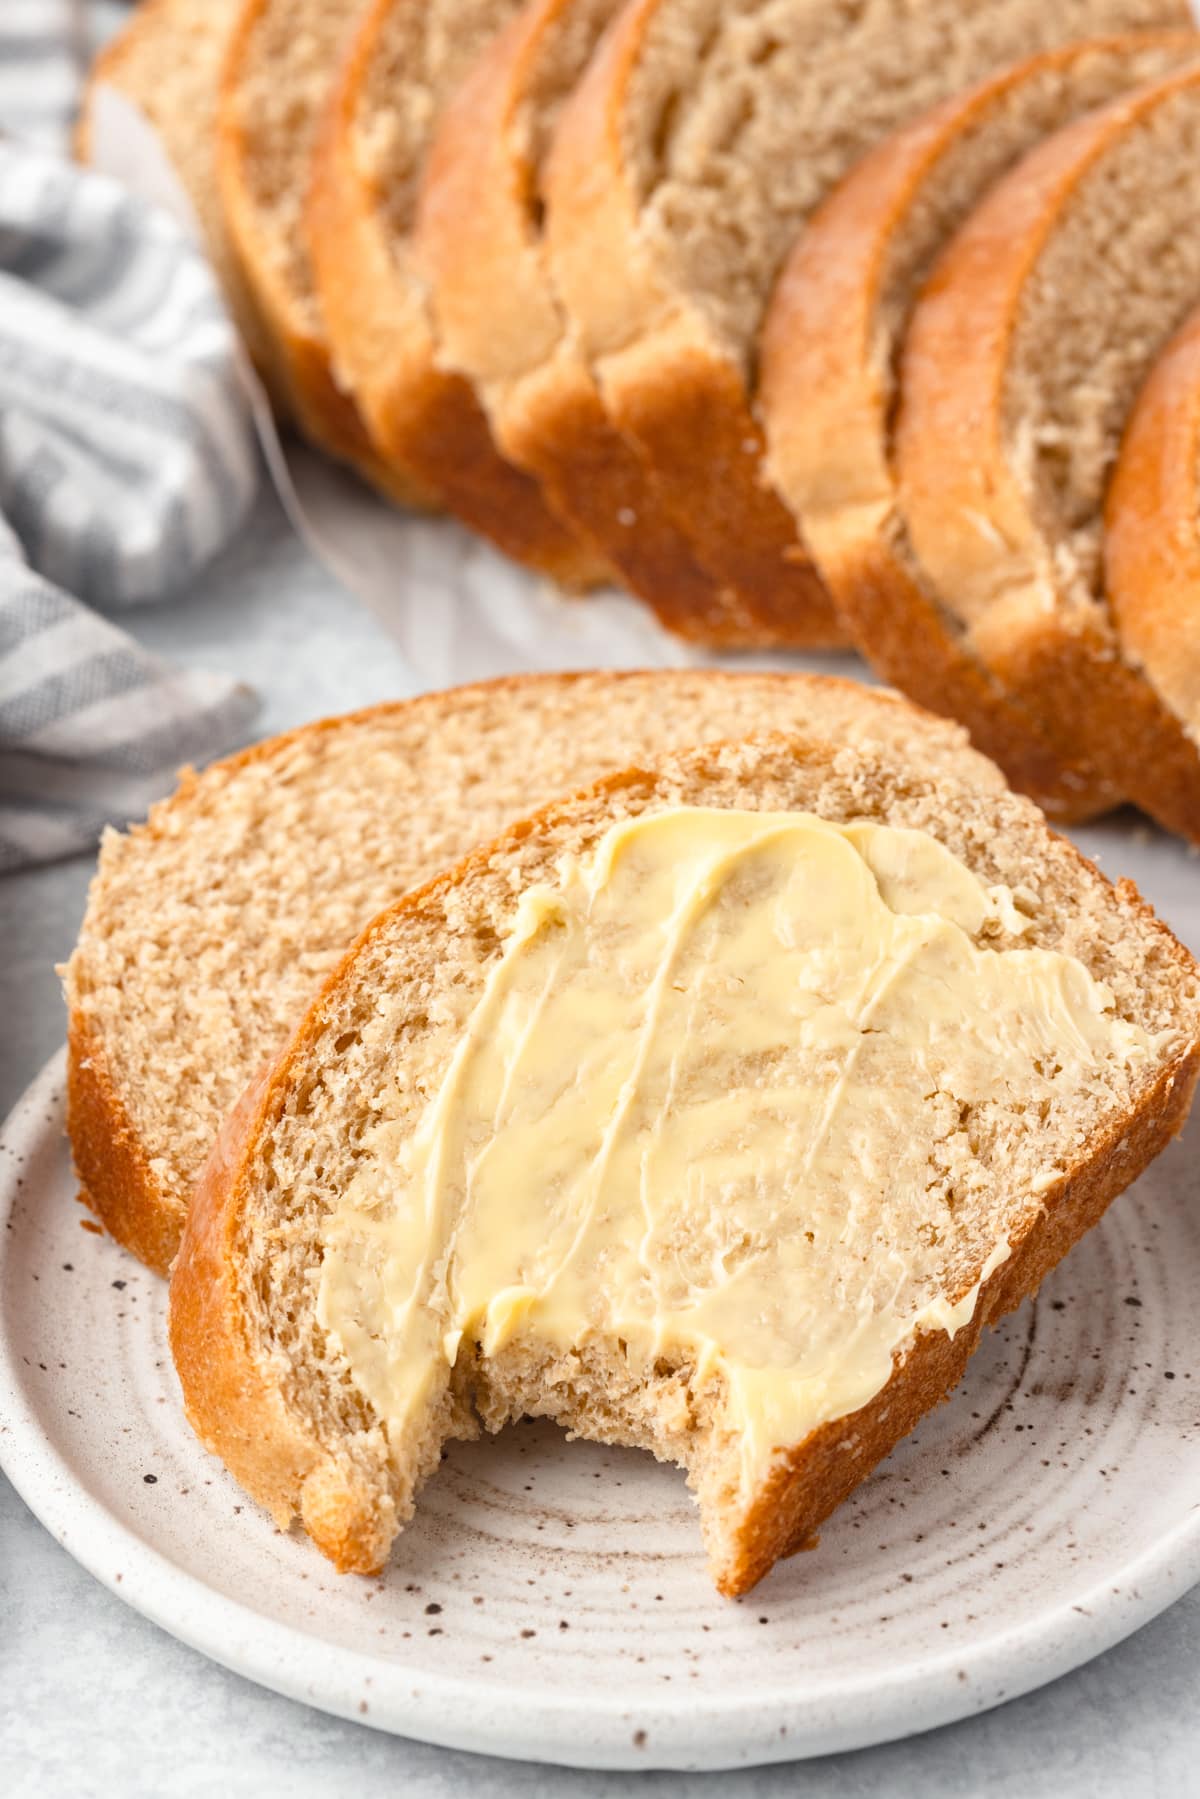
This bread makes excellent everyday sandwiches like peanut butter and honey, deli meat, tuna salad, or grilled cheese. It also makes very good cinnamon toast and French Toast since the slight sweetness and nuttiness of the fresh wheat works well with both. Honestly, it’s just as good warm from the oven with a little butter as anything else you could do with it!
More Freshly Milled Flour Recipes:
Love baking with freshly milled flour? Try these reader favorites: Best Banana Cake, Whole Wheat Pancakes, Whole Wheat Chocolate Chip Cookies, and Pizza Muffins.
Want to learn everything about Freshly Milled Flour? Check out my Complete Guide to Freshly Milled Flour for all the tips, techniques, and recipes you need to get started! This is the ebook I wish I had many years ago!

100% Whole Wheat Bread (made with Freshly Milled Flour)
Equipment
Ingredients
- 3 cups freshly milled hard white wheat flour
- 1 1/4 cups warm whole milk about 105°F
- 2 tablespoons butter very softened or melted
- 2 tablespoons honey
- 1 teaspoon apple cider vinegar
- 1 1/2 teaspoons salt
- 2 1/2 teaspoons yeast (instant or active dry)
Instructions
- In a large bowl combine the warm milk, yeast, and 1 teaspoon of sugar (optional. I like to give the yeast a little snack!). Let the mixture sit for 5 to 10 minutes until it becomes foamy. 1 1/4 cups warm whole milk about 105°F,2 1/2 teaspoons yeast (instant or active dry).
- Add the honey, melted butter, apple cider vinegar, and salt to the bowl. Gradually stir in the freshly milled whole wheat flour until a dough begins to form. 2 tablespoons honey,2 tablespoons butter very softened or melted,1 teaspoon apple cider vinegar,1 1/2 teaspoons salt.
- Transfer the dough onto a floured surface and knead for about 10 minutes, or until smooth and elastic. The dough should be slightly tacky but not sticky; adjust with a little extra flour or milk if necessary.
- Place the dough in a greased bowl, turning it once to grease all sides. Cover with a clean kitchen towel and let it rise in a warm, draft-free place until doubled in size, about 45 minutes to 1 hour.
- Gently punch down the dough to release any air bubbles. Shape it into a loaf and place it in a greased 9×5 inch loaf pan.
- Cover the loaf with the towel and let it rise for another 30-45 minutes, or until the dough has risen about 1 inch above the pan’s rim.
- Preheat your oven to 350°F. Bake the risen dough for 27-30 minutes, or until the loaf is golden brown and sounds hollow when tapped on the bottom.
- Remove the loaf from the oven and let it cool in the pan for about 10 minutes. Then, transfer it to a wire rack to cool completely before slicing.
Notes
Disclaimer: Nutrition information is calculated using standard whole wheat flour and is approximate. Freshly milled flour nutrition varies based on wheat variety and milling method.
Nutrition
This post contains links to affiliate websites, such as Amazon, and we receive an affiliate commission for any purchases made by you using these links. We appreciate your support!
Your whole wheat bread was easy to make and my family really enjoyed it. It reminded me of bread my father used to make.
Easy to make and extremely yummy! Nothing better than home made bread!
Homemade bread is a real treat, and this is a fantastic recipe. I love that it is made with freshly milled wheat – I had no idea of how much better it was for you nutritionally. This bread is delicious.
Wow, not only was this bread so soft and delightful, but it’s also better for you nutritionally as well? I love it – and will aim to make this bread more often!
This bread was so soft and perfect for sandwiches and toast! My daughters loved it and I love that I can make it from scratch 🙂
I can’t resist a good homemade bread, and this recipe was definitely a winner! Thank you so much for sharing, it is one of my new favorite recipes 🙂
Yay! I’m so happy to hear!!
I’m loving everything about this recipe. You had some VERY useful tips for this as well. SO helpful!
Soft, fluffy and full of great wheat flavor, just right not over powering as I sometimes find wheat flour! Freshly milled is the key I believe.
I don’t make bread very often but this recipe with freshly milled wheat was to tempting not to try. The bread was super good. Will definitely make again.
You have inspired me to mill my own flour . I have been a little hesitant but you have made it look so easy with this whole wheat bread recipe . Thanks for the inspiration.
Debbie, this is one of the best comments I”ve ever gotten! I’m so happy to read this, and please let me know if you have any questions!!
I am obsessed with my whole wheat bread, but I will have to try yours it looks so good! I love baking one and pretty much eating it for every meal until it’s gone!!
Thank you! I love trying out new bread recipes!!
This recipe was great! It made a very pretty loaf that tasted great.
Yay, so happy to hear! Thank you for leaving a comment!
I forgot the vinagor, the bread still turned our so good. One might think they could live on it.
So happy to hear! I think it still tastes good even without the vinegar, it just helps with the crumbliness.
Can you make this bread with sourdough starter instead of yeast?
Hi Debra! I never have, but I have not doubt that you can’t. If you try it, let me know how it turns out!
Would using water instead of milk make a big difference? It was the perfect crumb and not heavy and doughy. Family is lactose intolerant. I have to say it’s THE BEST recipe I’ve tried so far. I used a combination of white-hard red-kamut.
Hi Amanda! You can absolutely use water instead of milk, though it may slightly change the flavor and texture. Milk adds richness and tenderness to the bread, but water will still produce a great loaf—just a little less soft. Please let me know how it turns out!
I love this recipe so much. It’s the only recipe I use now. I’m new to fmf baking, and this is, by far, the best one I’ve tried.
Hi Mary! Thanks so much for your sweet comment! I’m so happy you enjoy it as much as we do!!
Super super tasty ! The recipe was also very easy and directions were perfect. Loved it and will make again.
Thank you for your comment, Katie, so happy to hear!
I have been milling my own wheat since January and boy was it a learning curve even for an experienced baker. I have tried multiple bread recipes. I stumbled across this recipe! This recipe is amazing!!!! I keep sharing it with people who are ready to give up milling and making freshly milled bread.
I have made this recipe 6 times with no fail!!! It is so predictable and so soft and delicious!! Thank you!!
Hi Kari! Thank you for leaving a wonderful comment, it made my day!
A few questions… Is it necessary to do any folding when shaping the dough? My fresh milled flour loaves that I follow with other recipes always come out with holes in the center and I’ve read thats possibly due to bad shaping/folding. Also, can I use oil instead Of butter? Third, can I knead this in a stand mixer?
Hi Rachel! I’ll give you some short answers, but if you need more explanations, just shoot me an email, I’d be happy to answer any question you have!
Folding: Yes, doing some folding when shaping really helps! It builds structure and can prevent big holes in the center.
Oil instead of butter: You can use oil. Just use a little less — about 3/4 the amount.
Stand mixer: Yes, you can knead it in a stand mixer on low speed (like speed 2) for about 10 minutes.
HTH!
First loaf of bread of I’ve made and it turned out great. Super easy recipe to follow and my toddlers ate the whole loaf in a day. They loved it!
Yay!! So happy to hear this!! My twins just love it too!!
Is the 3 cups of flour from 3 cups of berries or do you mill and then measure out what you need? I try to start with a specific weight of berries so I mill the flour I need for a recipe with nothing left over. I find for me that volume measures for freshly milled flour are challenging because the flour is “fluffy” from the milling process.
I mill, then measure out what I need. I like to mill extra and stash in the freezer. I never use freshly milled flour, like you said it’s too “fluffy” when it’s warm.
I want to try this. Sounds great
How long would you knead if using a Kitchenaide?
Hi Kendra! When using your KitchenAid mixer, use the dough hook, knead the dough on speed 2 for about 10-12 minutes since freshly milled wheat is more coarse and needs the extra time to develop proper gluten structure. Just watch the dough and adjust on how it feels. HTH!
Haven’t made this yet but any recommendations for substituting hard red for hard white? I’m super excited to try this recipe!
Hi Ruth! You can sub out hard red cup for cup. My family prefers the taste of all hard white, so I use that for this recipe.
Thank you for this! I got a grain mill and quickly realized my same-old recipes would not work anymore so I was really grateful to find your recipe!
If I want to make two loaves at a time, could I simply double the recipe and then split the dough before the second rise or would you recommend making them completely separately?
Hi Anjyla! I double the recipe all the time and just split it before the 2nd rise. Hope you love your grain mill!
My family loves this bread. My gluten free son can eat this with no problems!
The last time I made it it was more crumbly, especially after being frozen. Am I proofing it too long or perhaps it’s the freezer, drying it out?
Thank you! I tried it with hard red wheat milled flour, it was good! My husband approved it for me to repeat it.
Hi Serena, so happy to hear!
Can I make this bread in my bread machine?
hi Rachel! I haven’t tested it in a bread machine yet, but it should work on a whole wheat cycle, just keep an eye on the rise since freshly milled flour can behave a little differently.
I’m new to grinding my own flour so I ended up with a little denser loaf than I planned. But it was still so delicious and I can’t wait to try it again!
This bread was so delicious and fun to make! My family loved it so much!! I was wondering if I could use it to make pizza dough? Also, do you think it would work to make the bread dough, freeze it, then let it rise on the counter as it thaws and bake it? Thanks for a great recipe!