
Dutch Oven Sourdough Bread

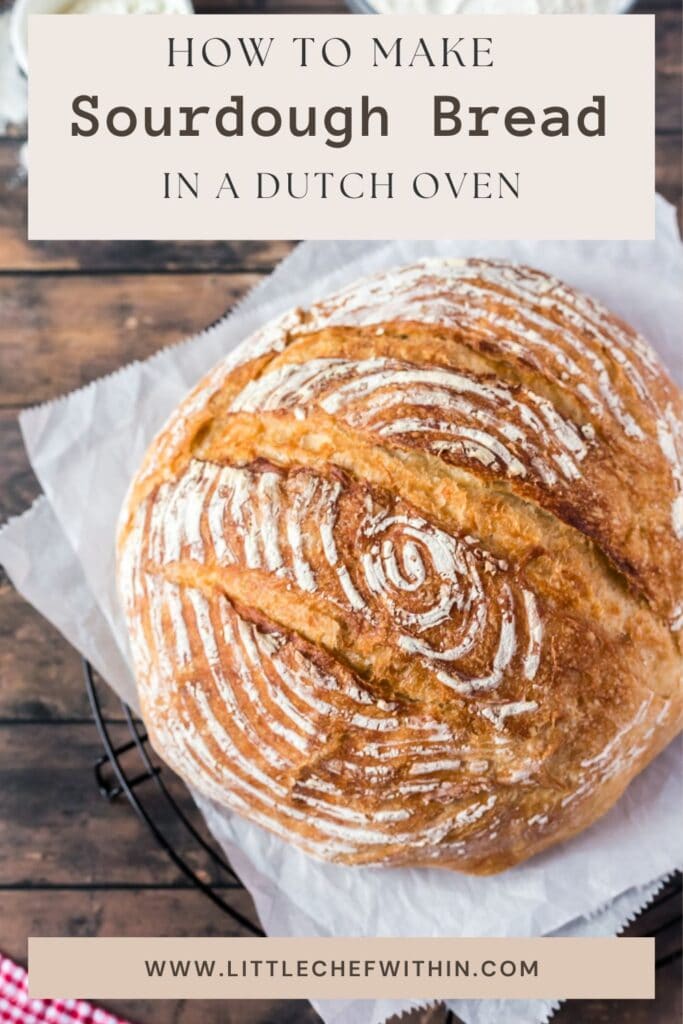


Dutch Oven Sourdough Bread is one of those recipes that’s way easier than it seems! With just a few simple ingredients, you can make a crusty, chewy loaf right at home.
The Dutch Oven does all the hard work, giving you the perfect bakery-style bread with hardly any effort! Whether you’re new to sourdough or already a fan, this recipe is a must try!

SAVE THIS RECIPE FOR LATER!
Don’t throw that sourdough discard away! Put it to good use with my easy Sourdough Pancakes, fudgy Sourdough Discard Brownies, and soft, sweet Sourdough Discard Cinnamon Rolls. All made with sourdough starter and perfect for using up the extra!
How to Make Homemade Bread:
There’s nothing like baking homemade bread. From mixing the dough to that first warm bite, it’s comforting, timeless, and deeply satisfying! The smell, the crust, the simplicity, it connects you to something essential. For any true foodie, bread is the heart of a meal and the soul of the kitchen!
This pretty much sums up my love for bread in a nutshell! nothing is as humble and basic as bread. When I say, “I love bread!”, I truly do! If you can’t resonate with the sentiment, then I’d say your’e probably not a homemade bread baker! Don’t worry, I hope t change that with my Dutch Oven Bread!

What you’ll love about this Dutch Oven Sourdough Recipe:
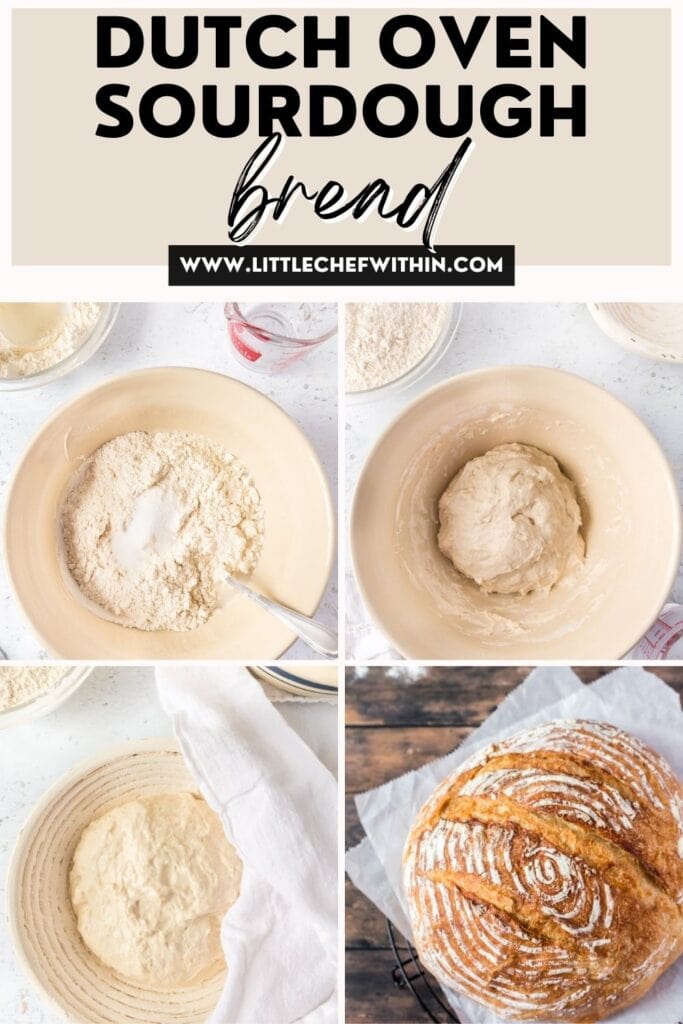
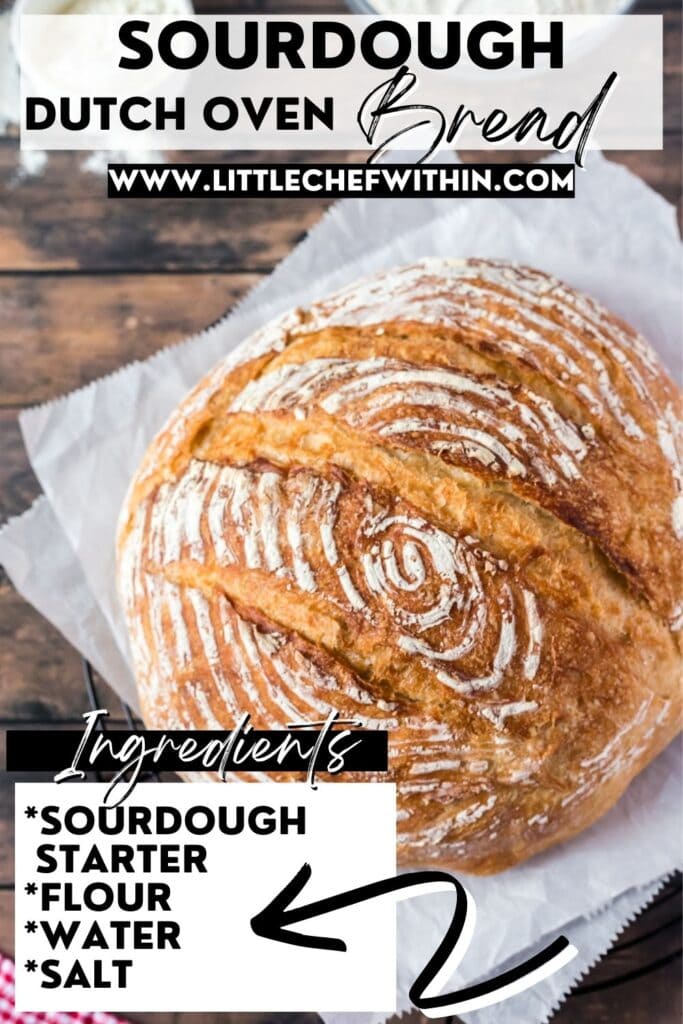
MINIMAL INGREDIENTS – It only requires 4 ingredients, starter, flour, water, and salt, plus a little time and love.
CRUSTY PERFECTION – Baking the bread in a Dutch oven creates the ideal conditions for achieving a crispy, golden crust that crackles with each bite
HEALTH BENEFITS– Sourdough bread offers potential health benefits, it’s generally easier to digest, and also better nutrient absorption, thanks to the natural fermentation process. That means less tummy discomfort.
Recipe Ingredients:
You’ll need the following ingredients to make this amazing Sourdough Bread Recipe:
- Active sourdough starter
- Warm water- Not too hot or it will kill the yeast, just warm like you’d bath a baby in
- Salt- Sea salt, or regular will do
- Bread flour

Ingredient Notes:
- Active starter: Make sure your sourdough starter is active and bubbly for the best results.
- Bread flour: This helps build strong gluten structure, giving the bread that chewy texture. You can substitute all-purpose flour if needed.
HOW TO MAKE DUTCH OVEN SOURDOUGH BREAD STEP-BY-STEP:
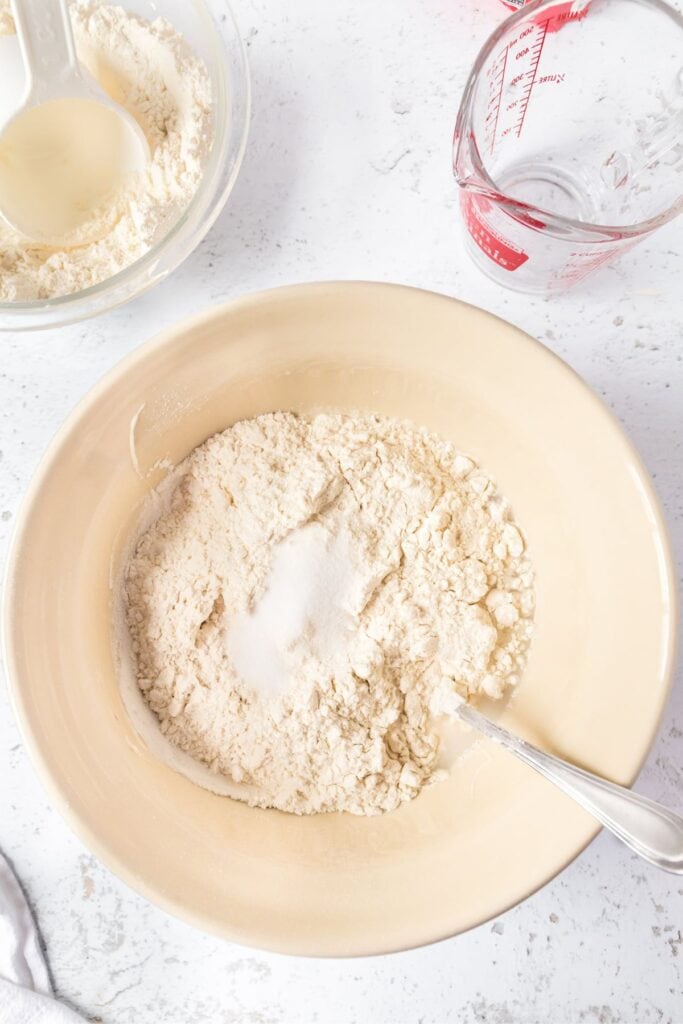
Step 1: Mix the Dough
In a large bowl, combine the active starter, warm water, and salt. Stir until the salt dissolves. Gradually add the bread flour and mix until a shaggy dough forms.
Step 2: Knead the Dough
Turn the dough out onto a lightly floured surface and knead for about 10 minutes, until smooth and elastic.
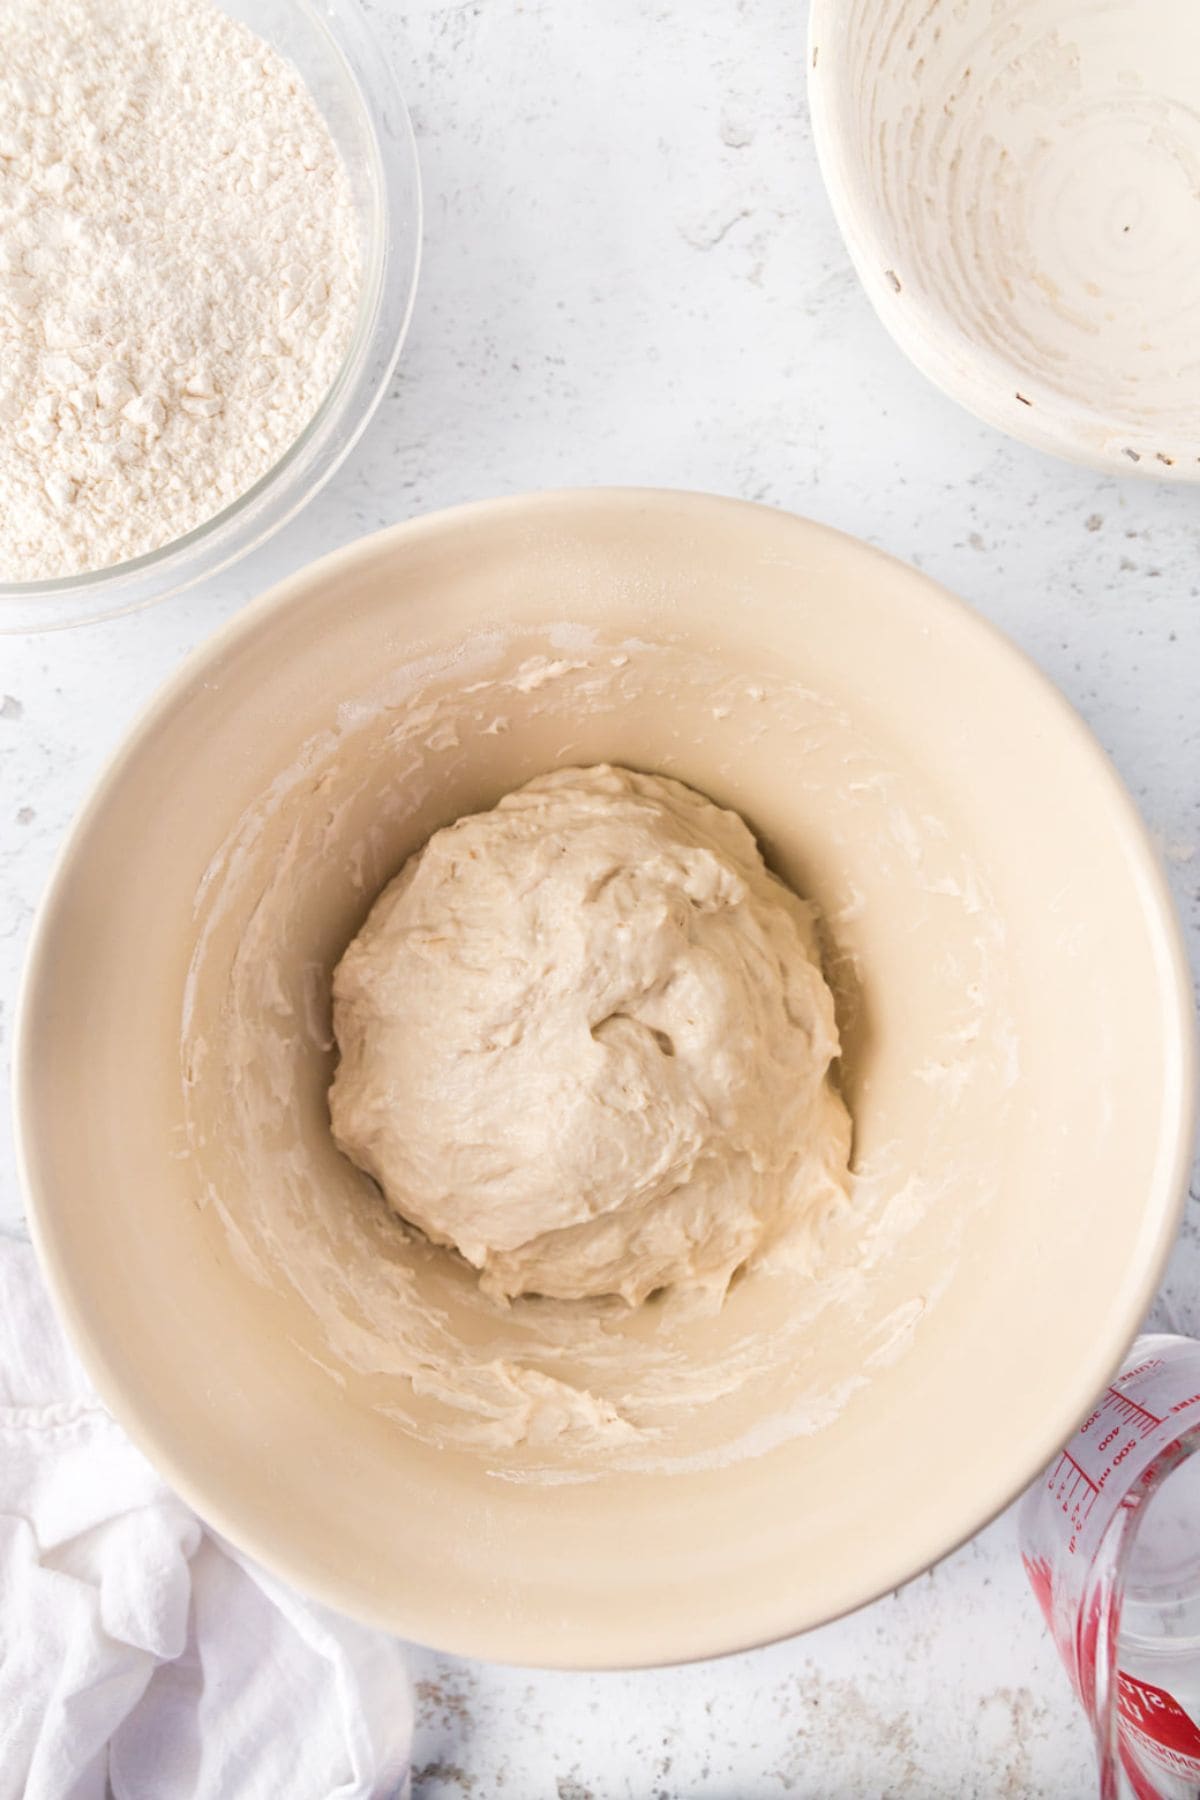
Step 3: First Rise
Place the dough back into the bowl. Cover with a damp towel and let rise at room temperature for 5 to 6 hours, or until doubled in size.
Step 4: Shape the Dough
Gently turn the dough out onto a floured surface and shape it into a round. Place the shaped dough into a generously floured banneton basket or a parchment-lined bowl.
Step 5: Second Rise
Cover the dough with a damp towel again and let it rise for another 2 to 3 hours at room temperature.
Step 6: Preheat the Oven
About 30 minutes before baking, preheat the oven to 450°F. Place your Dutch oven and its lid inside the oven to preheat.
Step 7: Score the Dough
Once the dough has finished rising, turn it out onto a piece of parchment paper. Use a sharp knife or razor blade to score the top of the dough.
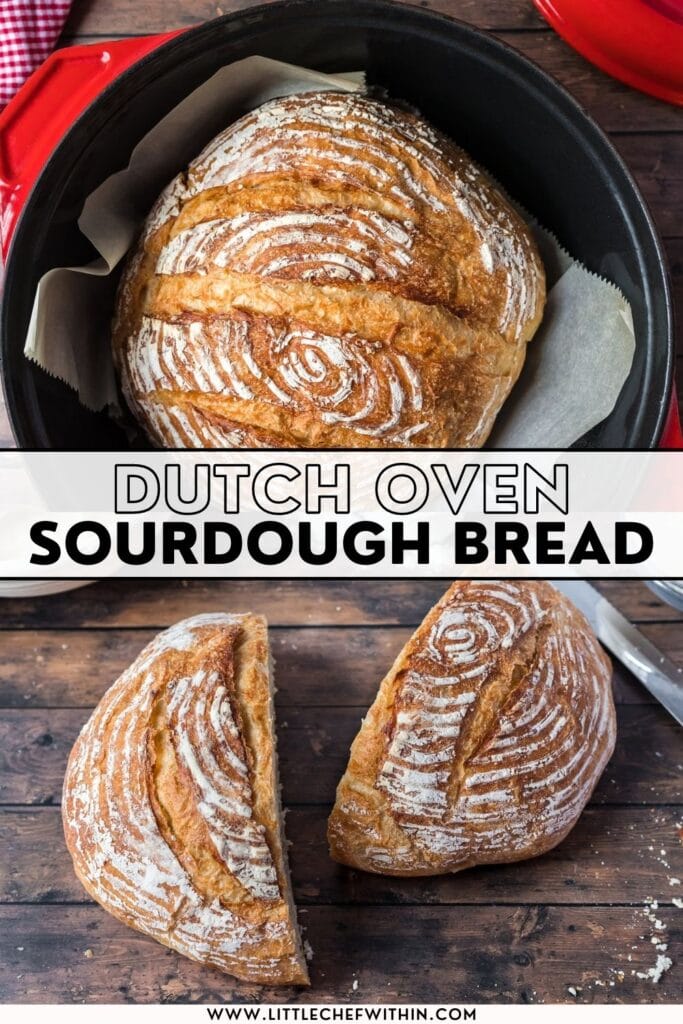
Step 8: Bake the Bread
Carefully lower the dough (with the parchment) into the hot Dutch oven. Cover with the lid and bake for 20 minutes. Remove the lid and bake for an additional 20 to 25 minutes until the crust is golden brown and crisp.
Step 9: Cool the Bread
Lift the bread out of the Dutch oven and place it on a wire rack to cool. Let it cool for at least 1 hour before slicing.

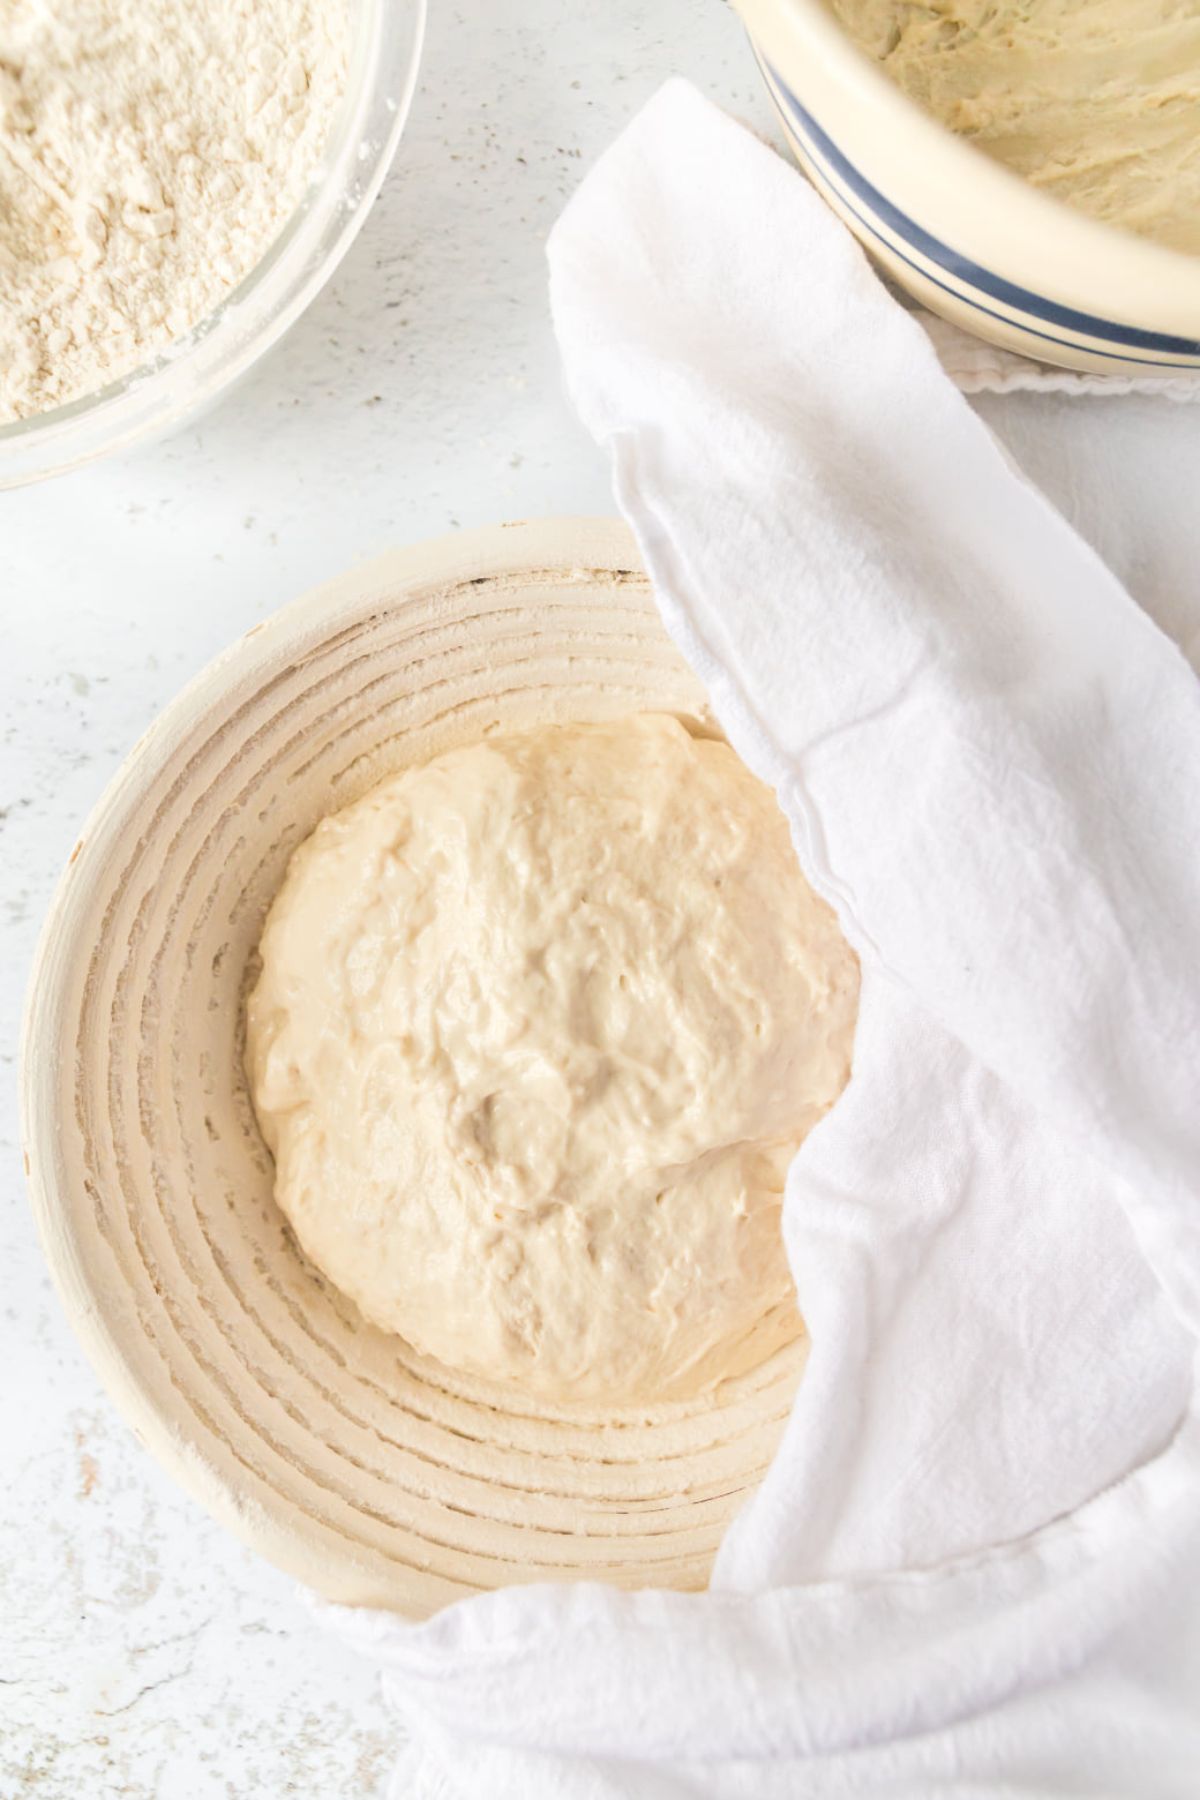
Want a pretty decorated loaf?
I love to use a Banneton bread proofing basket. The banneton basket has a woven structure that creates a pattern of ridges and flour-dusted indentations on the surface of the dough. These ridges help to create a beautiful spiral pattern on the crust of the bread as it bakes.
Pro Tip:
For better flavor, try letting the dough rise overnight in the fridge during the second rise. This slow fermentation helps develop a more complex flavor and a light, airy crumb with beautiful air bubbles.

Meet Hermie…
I created my 1st sourdough starter 20+ years ago, it was from a recipe called Herman. So ever since then I’ve always called my sourdough starters the same name. Throughout the years the name has been shortened to “Hermie” . I’ve discovered this is common amongst Sourdough aficionados. I would love to know what you nicknamed your starter, please share in the comments below.
Storage and Reheating:
- Storage: Store leftover sourdough bread at room temperature in a paper bag or bread box for up to 3 days.
- Freezing: You can freeze this bread for up to 3 months. Wrap it tightly in plastic wrap and foil before freezing.
- Reheating: To reheat, place the bread in a 350°F oven for about 10 minutes to restore its crispness.
Additions and Substitutions:
ADDITIONS:
- Seeds: Add sesame or sunflower seeds to the dough or sprinkle on top for added texture and flavor.
- Herbs: Mix in fresh rosemary or thyme to give your sourdough a fragrant, herby flavor.
SUBSTITUTIONS
- Flour: You can use all-purpose flour instead of bread flour, but the texture may be slightly less chewy.
- Salt: If you’re using fine salt, reduce the amount slightly, as it’s more concentrated than coarse salt.
FAQs about this Homemade Bread Recipe:
Do I need a Dutch oven to make sourdough? A Dutch oven helps create steam, which gives the bread a crispy crust, but you can also use a baking stone with a tray of water in the oven for a similar effect.
Can I let the dough rise overnight? Your sourdough starter should be bubbly and double in size a few hours after feeding. If it’s not active, let it sit for a bit longer before using.
Can I skip kneading the dough? While kneading helps develop gluten and structure, you can try a no-knead method by letting the dough sit longer and folding it a few times during the rise.


Dutch Oven Sourdough Recipe
Equipment
- Banneton basket
Ingredients
- 3/4 cup Active Sourdough Starter
- 1 1/4 cups Warm Water
- 1 teaspoon Salt
- 3 1/2 cups Bread Flour
Instructions
- In a large mixing bowl, combine the active sourdough starter, warm water, and salt. Stir until the salt is dissolved.
- Gradually add the bread flour to the bowl. Stir with a wooden spoon, fork, or a dough whisk until the mixture comes together into a shaggy dough.
- Turn the dough out onto a lightly floured surface. Begin kneading the dough by pushing it away with the heel of your hand and folding it back towards you. Continue kneading for about 10 minutes until the dough becomes smooth and elastic.
- First Rise: Place the kneaded dough back into the mixing bowl. Cover the bowl with a damp cloth or plastic wrap and let it rise at room temperature for about 5-6 hours. The dough should roughly double in size.
- Once the dough has risen, gently turn it out onto a lightly floured surface. Shape it into a round shape. Place the shaped dough into a banneton bread basket that has been generously dusted with flour, or lined with parchment paper.
- Second Rise: Cover the shaped dough loosely with a clean kitchen towel and let it rise for another 2-3 hours at room temperature. The dough will puff up slightly.
- About 30 minutes before baking, pre-heat your oven to 450°F. Place the Dutch oven with its lid on, inside the oven as it pre-heats.
- Once the oven is fully preheated, carefully remove the hot Dutch oven. Turn the dough out onto a piece of parchment paper, scored side up. Transfer the parchment paper with the dough into the preheated Dutch oven. Cover it with the lid and place it back in the oven.
- Bake the bread covered for 20 minutes. The lid will create steam, which helps the bread rise and develop a crispy crust.
- After 20 minutes, remove the lid from the Dutch oven and continue baking for an additional 20-25 minutes, or until the bread is golden brown and sounds hollow when tapped on the bottom.
- Once baked, carefully remove the bread from the Dutch oven and place it on a wire rack to cool completely. Allow the bread to cool for at least 1 hour before slicing.
Notes
Nutrition

Looking for more Bread Recipes? Check out our favorites on our BREAD PAGE.
Don’t be scared of sourdough bread, just do it!
Afterwards, you’ll be so proud of yourself for baking a glorious loaf of Sourdough Bread. Don’t worry if it’s not perfect right the first time, each loaf is a learning experience. The more you bake, the better you’ll get to know the feel and timing of the dough. Before you know it, you’ll be a Sourdough Superstar!
Did you make this recipe?
I’m excited for you to try this Dutch Oven Sourdough Recipe! After you make it, please leave a rating to let me know your thoughts on it – I’m eager to hear if you loved it as much as we do!
This post contains links to affiliate websites, such as Amazon, and we receive an affiliate commission for any purchases made by you using these links. We appreciate your support!
I hope it works for you, we love it!!
These are wonderful instructions on how to make homemade Dutch Oven Sourdough Bread. I’ve never tried making it, but it looks so yummy I’m inspired to try!
You should try it!!
Thank you giving suggestions on what to do with leftover bread! Can’t wait to try!
Hope you enjoy the recipe!
I’ve never tried to make sour dough, but this is inspiring. I just might give it a try!
You really should, you may love it!!
I have a 150 year old starter from California and once I started making sourdough bread I found that I cannot go back to store bought bread. Great information on this post.
Oh wow! You should package that and sell it! I’m sure it’d be super popular!!
Love this! Always been too nervous to try making bread but this recipe sounds great. Thank you
You should try it sometime, this one is easy!
I could easily eat the whole loaf on my own!
Bread is sooo good!!
I am a horrible baker but this looks so yummy, I may try again 🙂
Yes! Give it a try again!
Thank you for sharing this easy to make recipe. Sourdough sounds delicious.
Sourdough is so delicious, we love it!